A few weeks ago was my good friend Jayme's birthday party, so of course I wanted to make him a nice birthday cake. I asked what he wanted amongst his requests were vanilla cake, whipped cream and white chocolate. Sounds good already! I know he likes berries, so I decided to add some for a little contrast. After giving it a little thought, I settled on white cake with berry buttercream filling and white chocolate ganache-buttercream icing along with some fresh whipped cream on the side. With a lot of components and two dogs to pick up the day of the party (Hancock and Nova) I got started the night before the party.
Mixed Berry Compote
16 oz frozen strawberries
6 oz frozen raspberries
6 oz frozen blueberries
1/2 cup sugar
Put half of the strawberries, raspberries and blueberries into a saucepan along with all of the sugar. Over medium/medium low heat stir periodically for about 10 minutes. Smash the berries a bit with a spoon to release some of the juice. Then add the rest of the berries.
Continue stirring periodically for another 5-10 minutes.
Put them in a container and after they cool, pop it into the fridge to be used tomorrow.
Okay, so I guess I didn't do too much in advance for the party, but I like things to be fresh! I did all the rest the next day.
Lady Baltimore Cake
Another recipe from my stand-by cookbook, Fannie Farmer.
1 3/4 cups cake flour
2 teaspoons baking powder
1/4 teaspoon salt
8 tablespoons butter, softened
1 1/4 cups sugar
1 teaspoon vanilla
3/4 cup milk
3 egg whites
Preheat your oven to 350 degrees Fahrenheit.
Cream the butter and sugar together. Separately stir the milk and vanilla together. In another bowl, sift the flour, baking powder and salt together. Alternately add portions of the milk mixture and dry ingredients to the butter mixture, beating until the batter is smooth after each addition.
In yet another bowl, beat the eggwhites until they are stiff but moist.
Stir in about one third of the egg whites into the cake batter and then gently fold in the rest.
I put all of the batter into a 9"x13" pan, but this recipe says it would also work for two 8" pans. But be forewarned that it won't come out as tall as you might think, so I would consider doubling the recipe if you want a taller cake.
I wanted to make sure that the cake would come out cleanly from the pan, so I used a trick I had seen Alton Brown do on his show Good Eats. First I sprayed the pan with Pam, then place parchment paper across the widest part of the pan so that there was some coming off the edges (to be used as handles later). Then I put another piece of parchement paper along the narrower part of the pan.
Be sure to crease the paper into the corners; cake batter isn't strong enough to push it into place, and you don't want your edges to turn out all wonky, now do you? After you've laid out your parchment paper spray it with Pam. Okay, now you can pour in the batter.
Bake in the oven for about 20 minutes (time may vary depending on your oven). Test for doneness by poking in a toothpick; when it comes out clean, it's done! Let the cake cool for about 5 minutes and then using your handy dandy parchment paper handles, lift the cake out of the pan and quickly place onto a cooling rack (don't worry about removing the paper just yet).
I then repeated the entire process so I could make a large layer cake. Woops - none of the pictures of the cake on it's own turned out well, but don't worry, you'll see it in a minute with some other yummy stuff!
Mixed Berry Buttercream Filling
1/2 cup butter, softened
2 cups powdered sugar
1 tablespoon milk
1/2 teaspoon vanilla
1 cup mixed berry compote (strained)
This recipe is just a mixture of my usual buttercream frosting (remember?) and the mixed berry compote from above.
In a large bowl, cream together the butter and vanilla. Blend the sugar in one cup at a time. You may need to stop and scrape the sides and bottom of the bowl a few times to make sure it all gets thoroughly incorporated. Beat in the milk and continue mixing until light and fluffy.
Use a colander to strain the mixed berry compote, but save the liquid! Scoop about half a cup of the now strained compote into the buttercream and beat until well incorporated. Then gently stir in another half cup; you want some of the pieces of fruit to maintain some structural integrity for texture.
White Chocolate Ganache-Buttercream
24 ounces white chocolate chips
2 cups heavy whipping cream
1 cup butter, softened
4 cups powdered sugar
2 tablespoons milk
1 teaspoon vanilla
Put all of the white chocolate chips in a large microwave safe bowl.
Heat the heavy cream in a saucepan until it just begins to boil and then pour over the chocolate chips. Stir with a whisk until well combined. Since this can be tough work, I enlisted the hubs to do the heavy stirring for me.
When it got to the point where the chips were almost all melted, the mixture had cooled just a bit too much, so we popped the mixture in the microwave for 30 seconds to soften it so you can stir it together the rest of the way. Look at that, you just made white chocolate ganache!
I wanted the icing on the cake to be a little fluffier and more pliable than ganache, so I decided to mix in some buttercream frosting. You can probably get away with making just half of what I made for this round, but I wanted to be sure I had enough (and there's nothing wrong with a little leftover frosting - yum!).
So once again, in a large bowl, cream together the butter and vanilla. Blend the sugar in one cup at a time. You may need to stop and scrape the sides and bottom of the bowl a few times to make sure it all gets thoroughly incorporated. Beat in the milk and continue mixing until light and fluffy.
After the ganache has just about cooled, stir in about a half cup of the buttercream frosting. Then mix in another generous half cup or so.
Save the rest of your buttercream!
Whipped Cream
2 cups heavy whipping cream
1/3 cup sugar
Beat together with a whisk until peaks form. Make sure the heavy cream is cold before you start (and it doesn't hurt to pop the bowl into the fridge before starting either!). Turns out so tasty, even people who don't normally like whipped cream (such as myself) will like it!
Bringing it all together
Now let's assemble all this yummy stuff into a delicious cake! Carefully remove one of the cooled cakes from the parchment paper and place it onto whatever you'll be presenting the cake on. At this point it came to my attention that I don't have any pretty serving platters this big, so a cookie sheet is going to have to do (sorry, Jayme!). Spread the mixed berry buttercream onto the cake, trying to create a horizontal surface for the other cake to rest on.
Normally you would need to trim the top of your cake to make it flat, but since these didn't come out very tall I compensated with the filling. Carefully remove the other cake from the parchment paper and place it on top of the now filling topped cake.
Using a spatula, smooth the ganache-buttercream onto the cake. I recommend starting with it on top and working it over the sides.
There was a lot of real estate on top of the cake once I was done icing it, so I mixed several drops of blue food coloring into the remaining buttercream frosting. Then I scooped it into a plastic baggie and snipped a tiny corner so I could pipe some words and decoration on the cake.
I brought along the remaining mixed berry mixture (I put the strained liquid back into it) to put on the side with the cake along with the whipped cream.
After enjoying the tasty dinner that Jayme made for us we dug into the cake! Anjanette brought a cake, too! She made a marble cake with chocolate frosting, so it worked out perfectly that we had a white cake and a chocolate cake. Didn't she do a great job decorating it? Tasted great, too!
Happy Birthday, Jayme!
Tuesday, April 20, 2010
Sunday, April 11, 2010
Wrestlemania has moved indoors
A few days ago Hancock and Nova finally started playing together outside in the yard. It' super funny to watch; Hancock uses his size to his advantage and will grab Nova's legs, but since Nova can't really use his mouth because of the cone, he flips over on to his back to use his legs against Hancock. And as of a few minutes ago, my once peaceful household full of sleeping cats and dogs is no more. The pups have decided that the living room is now center stage for their wrestling matches. It's nice to see them settling in some more, and at least they're not chewing on the furniture (even if they are knocking some things over)!
Saturday, April 10, 2010
Meet Hancock and Casanova!
Last Saturday was a very busy day over here. In addition to making a faboo birthday cake for a good friend (more on that later) we brought home not one, but two brand spankin' new foster dogs. Since they were arriving on separate transports at the same time, the hubs and I planned to tag team this one and each retrieve a dog.
First to arrive home was Hancock. He's a red merle (mini?) Australian Shepherd and is about two years old. He made a nearly 300 mile journey from Hamilton, Illinois to arrive with us via nine very awesome people who assisted in transporting him and several other dogs from certain death in a kill shelter to safety in various rescues. He was picked up as a stray, but is clearly used to living in a home. He is very sweet and likes to give hugs and kisses. He's housebroken and doesn't mind the cats. The cutest thing about his is the way he lays down, with his little back legs splayed out behind him! Maybe Hamhocks would be a better name than Hancock!
Scheduled to arrive not long after Hancock was Casanova. When I went to get him some of the other volunteers at my rescue informed me that my new guy had ripped out the stitches from his recent neutering and that he would (obviously) need to get sewn up again before I could take him home. Apparently he chose not to play car games with the other dogs on the trip over from Winchester, Kentucky and thought undoing some surgery would be more fun.
Despite the open wound, Casanova was living up to his name by giving out kisses and taking belly rubs from anyone who would give them. He's an Australian Shepherd, I think with a little Rottweiler mixed in. So while he was getting sewn up again I headed back home to finish the aforementioned cake and Thomas went to pick him up when he was done. The poor guy was still so knocked out when Thomas got him home that he couldn't even stand, just lay there are wag his tail. But Nova (Casanova is really too long, so we're shortening it) is feeling much better and now proudly wears his cone of shame. Although we're thinking about renaming it the cone of destruction, because he is constantly knocking things over with it! Nova's got a great personality; he's very confident and friendly and loves everybody (and may love the cats just a little too much, but at least he knows they're not snacks!).
Yesterday Hancock and Nova actually started wrestling and playing the yard together instead of just coexisting. It's very exciting to see them settling in and having some fun!
First to arrive home was Hancock. He's a red merle (mini?) Australian Shepherd and is about two years old. He made a nearly 300 mile journey from Hamilton, Illinois to arrive with us via nine very awesome people who assisted in transporting him and several other dogs from certain death in a kill shelter to safety in various rescues. He was picked up as a stray, but is clearly used to living in a home. He is very sweet and likes to give hugs and kisses. He's housebroken and doesn't mind the cats. The cutest thing about his is the way he lays down, with his little back legs splayed out behind him! Maybe Hamhocks would be a better name than Hancock!
Scheduled to arrive not long after Hancock was Casanova. When I went to get him some of the other volunteers at my rescue informed me that my new guy had ripped out the stitches from his recent neutering and that he would (obviously) need to get sewn up again before I could take him home. Apparently he chose not to play car games with the other dogs on the trip over from Winchester, Kentucky and thought undoing some surgery would be more fun.
Despite the open wound, Casanova was living up to his name by giving out kisses and taking belly rubs from anyone who would give them. He's an Australian Shepherd, I think with a little Rottweiler mixed in. So while he was getting sewn up again I headed back home to finish the aforementioned cake and Thomas went to pick him up when he was done. The poor guy was still so knocked out when Thomas got him home that he couldn't even stand, just lay there are wag his tail. But Nova (Casanova is really too long, so we're shortening it) is feeling much better and now proudly wears his cone of shame. Although we're thinking about renaming it the cone of destruction, because he is constantly knocking things over with it! Nova's got a great personality; he's very confident and friendly and loves everybody (and may love the cats just a little too much, but at least he knows they're not snacks!).
Yesterday Hancock and Nova actually started wrestling and playing the yard together instead of just coexisting. It's very exciting to see them settling in and having some fun!
Monday, April 5, 2010
Dave Update
The other day I was thinking about Dave and wondering how he's settling in to his new home, so this email update from his forever family had perfect timing:
Carolyn,
We are not sure Bo and Dave are getting along very well. (J/K) Please see attached photos. Jake, formerly known as Dave, is doing great! He fits in perfectly. Him and Bo are best buds. The kids love him and he is becoming quite the Momma's boy, following me around all day and cuddling on the couch. He has been walking 1.5-2.0 miles of mine and Bo's walking route everyday and loves it. His stamina is not quite there yet to go farther and I don't want him to burn too many calories. Our vet feels confident that the palsey he has from the head injury could heal itself. Already, because of all the mouthing and stuff him and Bo are doing, his eating has improved dramatically. Thank you again for everything. We love him.
Bo on the left, Dave (Jake) on the right
Dave (Jake) on the right again
Dave (Jake) on the left - look at how muddy they are!
To say that this email and pictures give me the warm fuzzies would be a serious understatement. I can't even put into words how happy it makes me to see Dave (well, Jake) snuggling with his new brother Bo and to hear how much his family loves him. I mean, look at them! You can just tell that they're inseparable and totally best friends (and well cared for).
Yay, Dave!
Yay, Dave!
Monday, March 29, 2010
Biscuits with Blueberry Compote
Yesterday morning I wanted something a little different for breakfast, so I decided to make biscuits. I also remembered I had some blueberries in the freezer and wanted to make something with them to put on the biscuits to make things a little more special.
For the biscuits I went to my Fannie Farmer Cookbook. These were so easy and quick to make it's almost silly, and they were oh so good.
Baking Powder Drop Biscuits
2 cups flour
1/2 teaspoon salt
4 teaspoons baking powder
1 tablespoon sugar
1/2 cup cold butter (original recipe calls for vegetable shortening, but I prefer butter)
1 cup milk
Preheat your oven to 425 degrees Fahrenheit. Mix all of the dry ingredients together in a bowl.
Then cut the butter in using a pastry cutter or two knives. For this step it helps if you chop the butter into small chunks before adding it to the dry ingredients.
You don't want to create a paste, just kind of a coarse texture where the butter is broken into small pieces.
Then add the milk all at once and stir until just combined.
You can see that the dough isn't perfectly smooth and there are visible chunks of butter. That's what makes the biscuits so tender! Drop by large spoonfuls onto a cookie sheet. I used my trusty Silpats to make sure they wouldn't stick to the cookie sheet at all.
Bake for about 10 minutes. Done! Makes around a dozen biscuits.
While the biscuits were baking I got started on a blueberry compote that I whipped up on the fly and turned out great.
Blueberry Compote
2 cups frozen blueberries, divided
1/3 cup water
1/2 cup sugar
2 tablespoons orange juice
generous dash nutmeg
generous dash cinnamon
Put 1 cup of the blueberries (no need to thaw), the water, sugar, juice and spices into a small pot over medium heat.
Be sure to keep an eye on this and stir periodically as it boils to keep anything from burning. After around 5 minutes I smashed the berries a bit with the spoon I was stirring with to thicken it a little.
Continue heating and stirring for another 5 minutes and then add the rest of the blueberries. Keep heating and stirring that for another 5 to 10 minutes. That's it!
Now put a biscuit on a plate, cut it in half and ladle in some of that blueberry goodness.
Mmmm, delectable.
For the biscuits I went to my Fannie Farmer Cookbook. These were so easy and quick to make it's almost silly, and they were oh so good.
Baking Powder Drop Biscuits
2 cups flour
1/2 teaspoon salt
4 teaspoons baking powder
1 tablespoon sugar
1/2 cup cold butter (original recipe calls for vegetable shortening, but I prefer butter)
1 cup milk
Preheat your oven to 425 degrees Fahrenheit. Mix all of the dry ingredients together in a bowl.
Then cut the butter in using a pastry cutter or two knives. For this step it helps if you chop the butter into small chunks before adding it to the dry ingredients.
You don't want to create a paste, just kind of a coarse texture where the butter is broken into small pieces.
Then add the milk all at once and stir until just combined.
You can see that the dough isn't perfectly smooth and there are visible chunks of butter. That's what makes the biscuits so tender! Drop by large spoonfuls onto a cookie sheet. I used my trusty Silpats to make sure they wouldn't stick to the cookie sheet at all.
Bake for about 10 minutes. Done! Makes around a dozen biscuits.
While the biscuits were baking I got started on a blueberry compote that I whipped up on the fly and turned out great.
Blueberry Compote
2 cups frozen blueberries, divided
1/3 cup water
1/2 cup sugar
2 tablespoons orange juice
generous dash nutmeg
generous dash cinnamon
Put 1 cup of the blueberries (no need to thaw), the water, sugar, juice and spices into a small pot over medium heat.
Be sure to keep an eye on this and stir periodically as it boils to keep anything from burning. After around 5 minutes I smashed the berries a bit with the spoon I was stirring with to thicken it a little.
Continue heating and stirring for another 5 minutes and then add the rest of the blueberries. Keep heating and stirring that for another 5 to 10 minutes. That's it!
Now put a biscuit on a plate, cut it in half and ladle in some of that blueberry goodness.
Mmmm, delectable.
Sunday, March 28, 2010
Oatmeal Chocolate Chip Raisin Cookies
This recipe is an old one but a good one. They are the cookies that my mom would make when my brother and I were growing up (and still makes them now). They have also become my standby I-need-to-bake-something-for-this baked good.
These cookies are no fuss, reliably turn out tasty and are always a crowd pleaser (unless you're a certain one of my friends who has "texture issues" with raisins in cookies in which case I will bastardize the recipe and leave the raisins out even though I think they really make the cookies, but I digress).
According to the recipe that my mom has, this is a Mrs. Field's recipe, but I don't really have any way of confirming it since it was copied down by a friend of hers over 20 years ago.
Here's what you'll need to make my Oatmeal Chocolate Chip Raisin Cookies:
1 cup butter, softened
1 cup white sugar
1 cup brown sugar
2 eggs
1 teaspoon vanilla
2 cups flour
3 cups oatmeal
1/2 teaspoon salt
1 teaspoon baking soda
1 teaspoon baking powder
1 1/2 cups chocolate chips
1 1/2 cups raisins
Before you start making the cookie dough, turn your oven on so it can preheat to 350 degrees Fahrenheit.
Put the butter and sugars into a large mixing bowl and then cream them together.
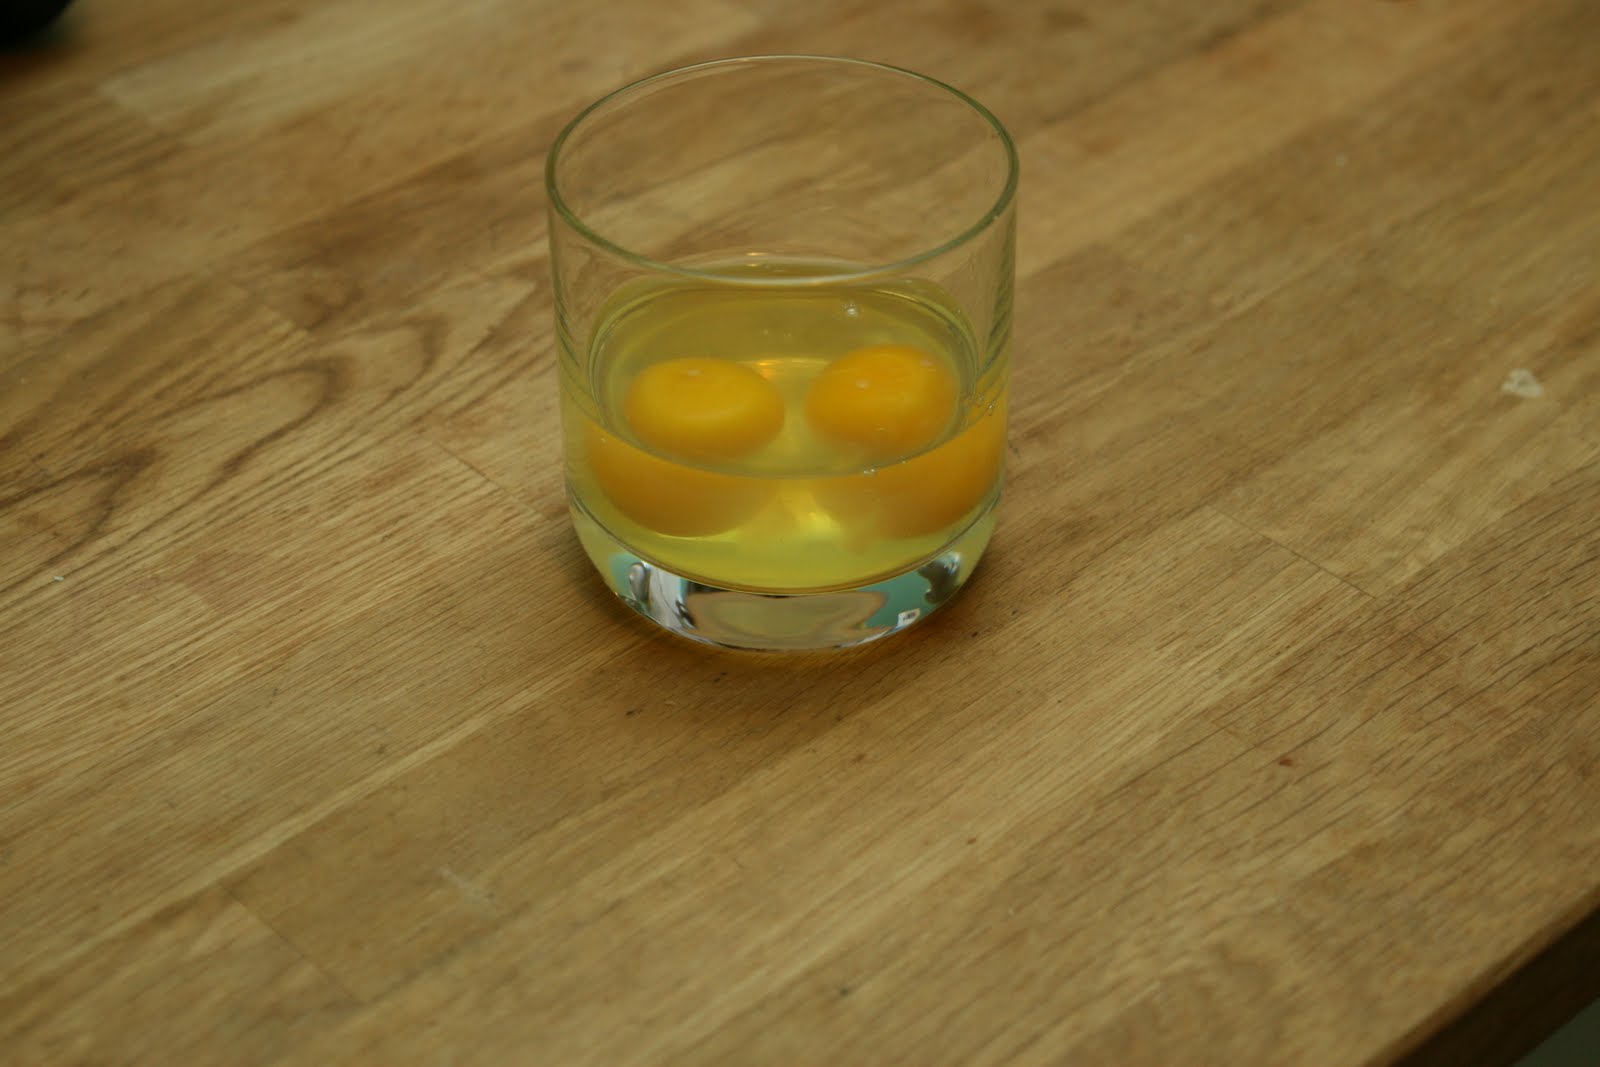
I like to crack my eggs into a glass before adding them so I can be sure that no shell has fallen in. After I do that, I can add the eggs and vanilla and mix well.
At this point most recipes tell you to mix all the dry ingredients together before gradually adding them to the wet. But I have tried this recipe by doing that and also by just dumping them all into the mixing bowl at once and quite frankly, for this recipe you cannot tell the difference. So save yourself another dirty bowl and go ahead and add the flour, oatmeal, salt, baking soda and baking powder to your wet ingredients and mix until combined.
Add the chocolate chips and raisins; I like to do one and then the other. I like my cookies loaded, so if you like more cookie and less chocolatey/raisiny goodness, go ahead and add less. I don't know why you would, but it's your kitchen and you can do whatever you want. And I'll do whatever I want, and I want a lot.
Drop spoonfuls of the cookie dough onto an ungreased cookie sheet. I like to use my cookie dough scoop largely because it gives me consistently sized cookies.
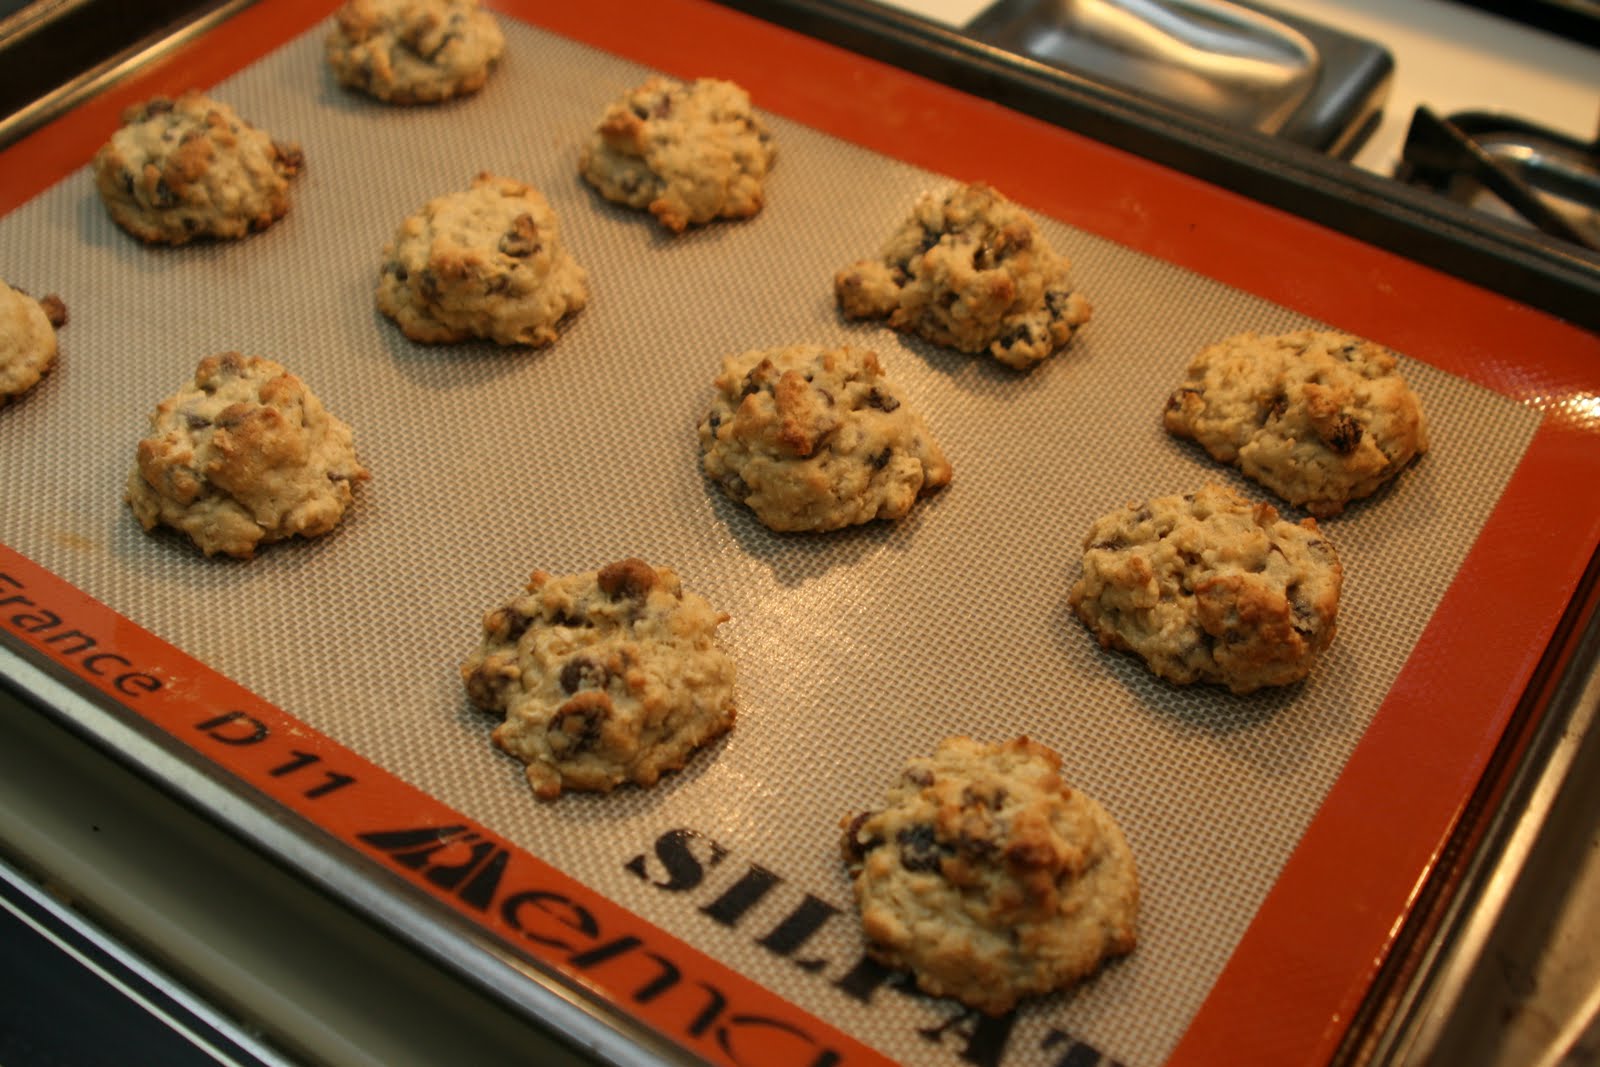
And I like to use my Silpats on my cookie sheets because it prevents any sticking. It also makes the cookies bake more evenly in my runs-kind-of-hot-especially-in-one-corner-but-mostly-from-the-bottom-so-it's-easy-to-burn-stuff-on-the-bottom-before-it's-cooked-on-the-top oven. I have noticed that the Silpats create a cookie that puffs up more instead of spreading out a bit, so if you want your cookie flatter, smoosh them down a bit if you're using one. And if you'r not using one just be forewarned that your cookie will be a little flatter, but no less delicious and will still come off the cookie sheet with ease.
Now pop those suckers in the oven. Mine were done in 6 minutes, but your baking time may very depending on your oven. I also like my cookies to be nice and chewy, so if you want it crisper bake it longer.
This recipe yields about 5 dozen cookies, and while that sounds like a lot, they don't last long in our house or at parties. So hurry up and grab a glass of milk while the cookies are warm before your family eats them all without you!
These cookies are no fuss, reliably turn out tasty and are always a crowd pleaser (unless you're a certain one of my friends who has "texture issues" with raisins in cookies in which case I will bastardize the recipe and leave the raisins out even though I think they really make the cookies, but I digress).
According to the recipe that my mom has, this is a Mrs. Field's recipe, but I don't really have any way of confirming it since it was copied down by a friend of hers over 20 years ago.
Here's what you'll need to make my Oatmeal Chocolate Chip Raisin Cookies:
1 cup butter, softened
1 cup white sugar
1 cup brown sugar
2 eggs
1 teaspoon vanilla
2 cups flour
3 cups oatmeal
1/2 teaspoon salt
1 teaspoon baking soda
1 teaspoon baking powder
1 1/2 cups chocolate chips
1 1/2 cups raisins
Before you start making the cookie dough, turn your oven on so it can preheat to 350 degrees Fahrenheit.
Put the butter and sugars into a large mixing bowl and then cream them together.
At this point most recipes tell you to mix all the dry ingredients together before gradually adding them to the wet. But I have tried this recipe by doing that and also by just dumping them all into the mixing bowl at once and quite frankly, for this recipe you cannot tell the difference. So save yourself another dirty bowl and go ahead and add the flour, oatmeal, salt, baking soda and baking powder to your wet ingredients and mix until combined.
Add the chocolate chips and raisins; I like to do one and then the other. I like my cookies loaded, so if you like more cookie and less chocolatey/raisiny goodness, go ahead and add less. I don't know why you would, but it's your kitchen and you can do whatever you want. And I'll do whatever I want, and I want a lot.
Go ahead and eat some dough, you know you want to!
Drop spoonfuls of the cookie dough onto an ungreased cookie sheet. I like to use my cookie dough scoop largely because it gives me consistently sized cookies.
And I like to use my Silpats on my cookie sheets because it prevents any sticking. It also makes the cookies bake more evenly in my runs-kind-of-hot-especially-in-one-corner-but-mostly-from-the-bottom-so-it's-easy-to-burn-stuff-on-the-bottom-before-it's-cooked-on-the-top oven. I have noticed that the Silpats create a cookie that puffs up more instead of spreading out a bit, so if you want your cookie flatter, smoosh them down a bit if you're using one. And if you'r not using one just be forewarned that your cookie will be a little flatter, but no less delicious and will still come off the cookie sheet with ease.
Now pop those suckers in the oven. Mine were done in 6 minutes, but your baking time may very depending on your oven. I also like my cookies to be nice and chewy, so if you want it crisper bake it longer.
Nice and gooey
This recipe yields about 5 dozen cookies, and while that sounds like a lot, they don't last long in our house or at parties. So hurry up and grab a glass of milk while the cookies are warm before your family eats them all without you!
Subscribe to:
Posts (Atom)